Tuesday, November 24, 2015

The Moon

I purchased a Cannon SX410 IS camera for my wife for Christmas. I wanted something with a good quality zoom to take nature pictures when we are out hiking. This camera has a 40x zoom lens. To test it out I zoomed in on the moon last night and snapped a picture. I'm very pleased with the results!


Sunday, May 24, 2015

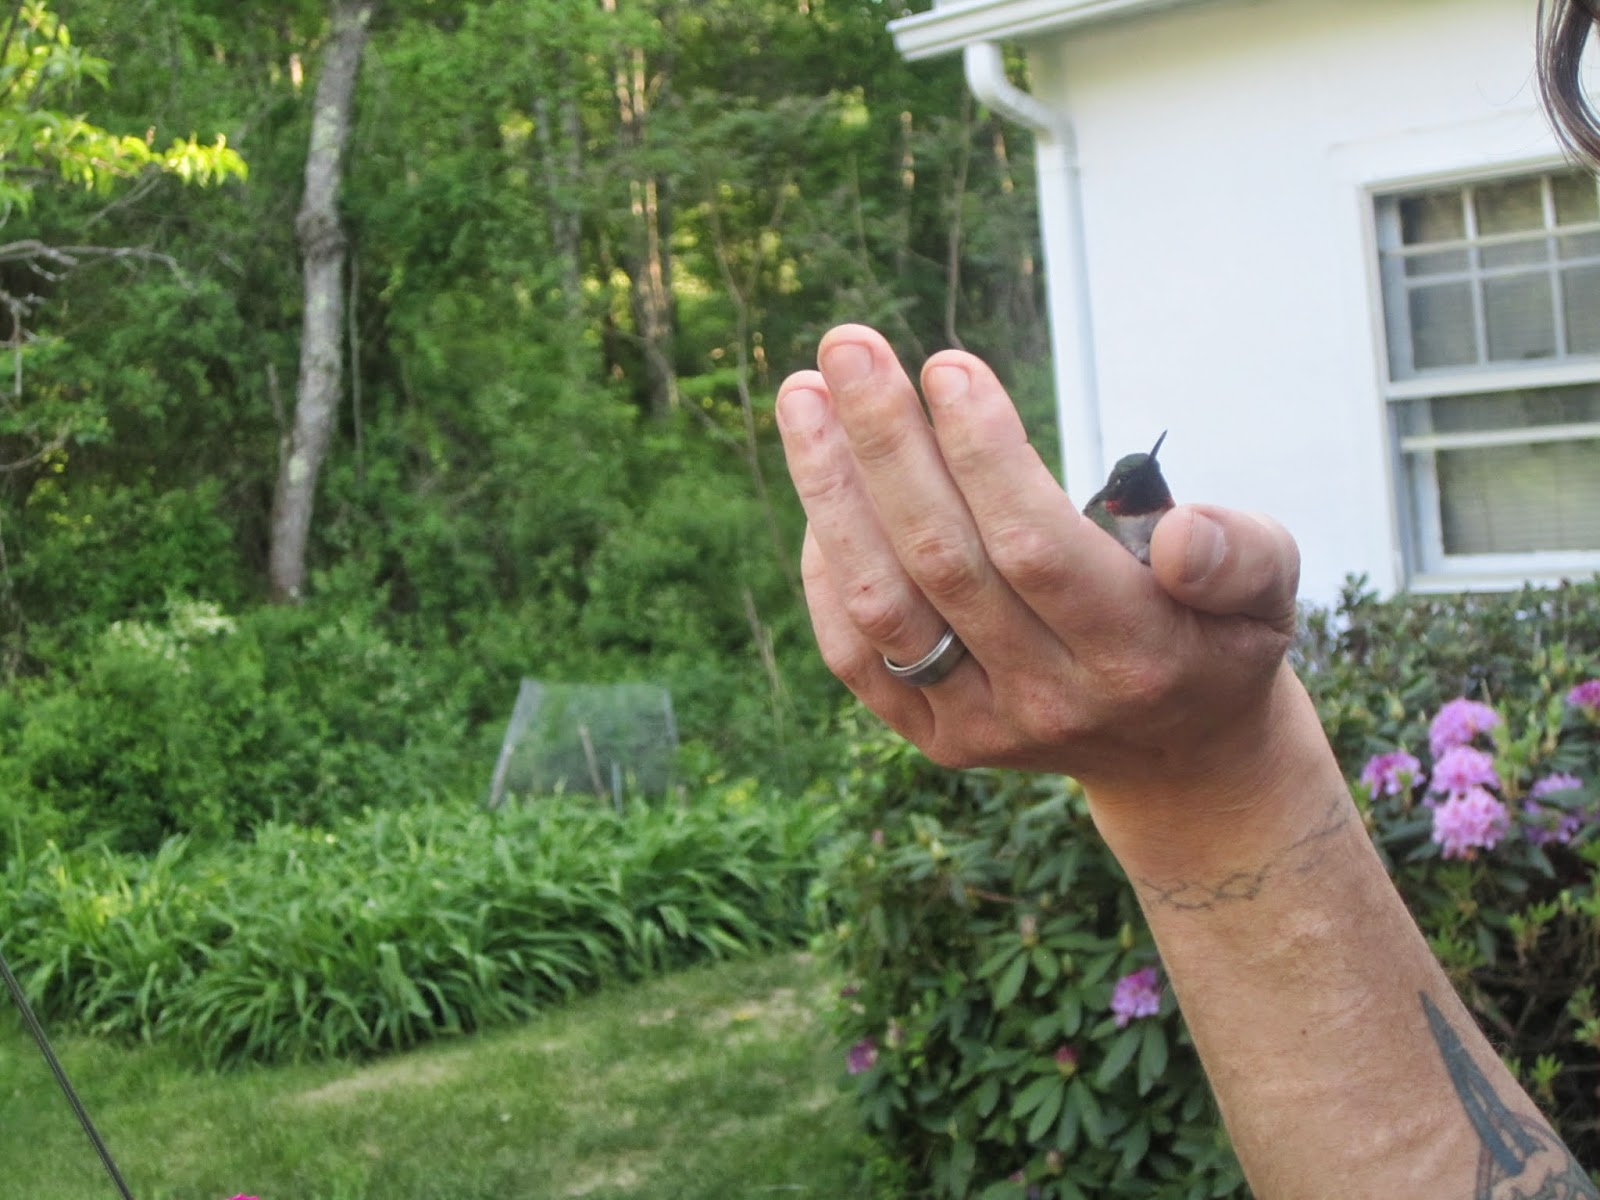
Little Lost Hummingbird

My son Devin found a hummingbird dazed and covered in cobwebs in our garage. We brought him in, cleaned him up then, took him back out to get some pollen and sugar water. That seemed to do the trick. He flew off happy and refreshed. I'm so glad my son found him and, he is ok. They are my favorite bird. It was so cool to hold the flowers up to him and let him eat the pollen. He seemed to think it was pretty cool too..


Tuesday, September 16, 2014

This week's digital scribble - Elf Girl

 This week's digital scribble. Three days in Photoshop! The person I used as a reference is TarynTragedyy. She can be found on facebook and Deviant Art. This was done all in Photoshop. Thanks for looking!


Friday, September 12, 2014

How I scribble in Photoshop

 Find a good image to reference off the internet to give you an idea of the pose, shape and lighting. This will be my go to image for the pose and to see how the shadows fall on the face.

 This is what I call the turd stage. I call it that because it always looks like a turd when I start scribbling. All I am trying to accomplish here is working out the basic structure of the head. I try to place the eyes nose and mouth with a rough hairline. I know it looks bad but this is a start. The basic structure of a face is the most important part of making my scribble look right.

 Next I add a layer and rough out a quick sketch of the head and face. It looks bad sure but now I'm getting an idea of where everything goes. In this stage I scribble away. It does not have to be that neat

 Here is the quick scratch scribble layer by itself. I need this layer to figure out where my final lines will be. Sketch, scribble, erase, do what needs to be done to get the basic face and features in place. This is why I call what I do scribbling. Whether I'm painting in Photoshop or drawing with a pencil, I'm scribbling away to start my drawing.

 Now using the scratch scribble layer as my guide I can work out the final lines in the next layer.

Here are the final lines. These have to look nice and clean. I will spend hours just getting these where I want them. My hands are shaky and as you have seen on the last two layers I make a messy line with the mouse. I can get nice straight lines in Photoshop using the (Hold Shift/ Left Click method with the brush tool). I call this polishing the turd. It was OK for the last couple of layers to look turd like but, these lines need to be as clean as I can get them. These lines are the main guide for the final piece.
 
 Now it is time for basic colors. I always do everything in different layers in case I screw up something I can go back and fix it with ease. I usually end up with over 30 layers on an individual scribble.

 Another color layer for the hair.

 Layers for the basic eyes and lips color.

 Now I can start adding layers to shadow and highlight the eyes giving them depth.

 Here I'm using the smudge tool, dodge and burn tools to create depth in the lips and better brow shapes. I'm also using the smudge tool to get a better look at the bottom of the hair.

 Here I'm hiding my guide lines and trying to add shading to the nose face and mouth by adding black and white layers and changing there opacity till they look right. I will still turn the guide lines on and off as I need them. For the most part I want to be able to hide them when the final version is done.

 I'm adding more black layers with low opacity to add more shading. It gives the face more depth

I've added lashes by cheating and using a brush. Brushes can add great effects so I use them when I need them.

 More shading, Highlights and tweaking. Trying to get the depth in the face right.

 More shading, Highlights and tweaking. Trying to get the depth in the face right.

 Some tweaks to the eyes. I added some shadows around the eyes for more of a 3d look. I also added a layer that creates a spectacular lighting effect that really makes the eyes pop.

 Now lets add some layers to the hair giving it more color and flow.

 Another color layer is added to the hair to create a flow effect I can use later.

 Now I merge all the hair layers and go to town with the smudge tool.

 Still messing with the hair! I hate doing the hair.

 Adding some depth to the hair with the burn tool. I'm still adding little tweaks to the face as I go to give the face more depth. I also used skin and freckle brushes to add effects to the skin.

 Now I'm adding a new layer to her to give her a basic shirt color. I'm still tweaking the eyes too. Making the lids and lashes darker.

 I'm tweaking the shirt layer with the dodge and burn tools. I get great effects when I use different brushes for this. I like using brush 17 to add these effects to the hair and clothing.

 Added a color to the background.

 Added more shadows and highlights for depth. Again I'm using the burn and dodge tools to create shadow and highlights. I also used some hair brushes I have to tweak the hair a bit.

 I added some more layers to the background so, it is not as boring. I added some more shadows and highlights. I think this is just about done for now. See, you can polish a turd!

This is my finished work next to the reference image. I know it is not exactly the same but, it is not supposed to be. It was the guide for my scribble.


Thanks for checking this out!
  -Mark 

-edit-

This is the finished piece. I spent a couple more hours touching it up. I darkened the eyes and shadows, darkened around the iris, added some white to the lips to create more depth, gave her a couple small beauty marks, and I found some cool hair strand brushes to fix up the hair. I could tweak this for days but, I'm calling this done before I get carried away.

Friday, February 21, 2014

Pierrot

This is a neat Pierrot costume created by my fellow vendor Esha at Runtime DNA. I worked very hard on this figure and he has been released in the Runtime DNA store. This is a render I did of him in Esha's Pierrot costume in Poser Pro 2014. I like the sad quality of this render and, I am proud of the job I did creating this figure.


Tuesday, February 11, 2014

Ready for Battle

Only a few days till she is released! Here is a quick render of SuzyQ 2. She will be released by RDNA this Friday. A lot of RDNA vendors have put a lot of time and effort to make this figure great. I'm grateful for their help and support. Here is to a great release! Modeled in Lightwave and Zbrush rendered in POser Pro 2014. Clothing by: LadyLittlefox, Textures by mstene, figure by myself and Netherworks Studios.

Tuesday, February 4, 2014

Owl on the line

  I walked outside my door, looked up and, on the power lines above my driveway there was an owl just hanging out. I have only seen an owl in the wild twice in my life. I have never seen one this close in broad daylight. Also I got to talk with him. He was looking away and I said "Hey pretty bird" to get him to look over for a picture. The only camera I had on me was my itouch. I wish I had my good camera on me at the time. The itouch takes grainy pictures at a low resolution. Oh well, at least I have a picture. I just wish the photo did this beautiful bird some justice. :D My buddy Andrew Volpe, who is a big owl fan, has informed me that this is a Barred Owl.

Update:
  Here is a better picture. He came back to hunt in my yard. I took this shot through my window with the good camera. 
Update 2:
  He came back yet again. This time I was able to go outside and get a few good shots of him on my power lines. He did not seem to be bothered by me asking him to pose for the camera.